How Minimax Plays Perfect Tic-Tac-Toe: A Worked Guide

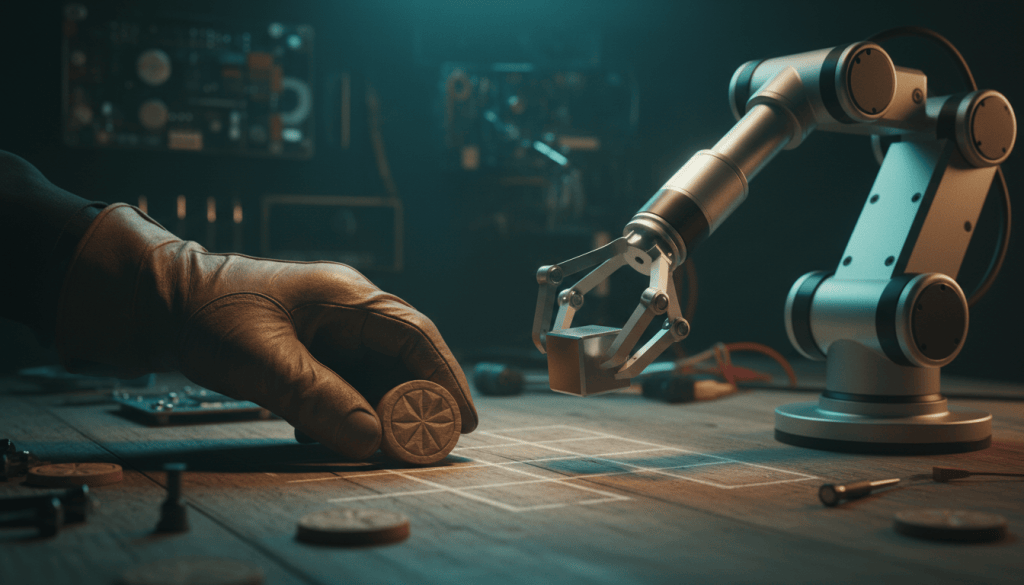
A maker at a workbench sketching game trees beside a tic-tac-toe board

In my last post I showed my robot arm playing a full game of tic-tac-toe. A minimax search works out the best moves, Gemini picks one of them, and the arm places the piece. I skimmed over the minimax part there. This post digs into it properly, with worked examples and the real code from the GitHub repo.

To keep myself honest, I wrote a small Python version of the same algorithm, using the same scoring as the arm’s code, and ran it to produce every number in this post.

Numbering the board

The arm’s code numbers the squares 1 to 9, left to right, top to bottom. I’ll use the same layout throughout:

 1 | 2 | 3
---+---+---
 4 | 5 | 6
---+---+---
 7 | 8 | 9

The arm always plays X and I play O. Either of us can go first.

The game tree

Minimax starts from a simple idea. From any position, list every legal move. For each of those moves, list every reply. Keep going until every line ends in a win, a loss or a draw. What you get is a game tree: the current position at the root, every possible future spreading out below it, and finished games at the leaves.

Once you have the tree, you can work backwards from the leaves to the root and find the best move, provided you assume both players always play their best.

The maximiser and the minimiser

Every finished game gets a score from X’s point of view. Positive is good for X, negative is good for O and zero is a draw.

X is the maximiser. On X’s turn, it picks the move with the highest score. O is the minimiser. On O’s turn, it picks the move with the lowest score, because the lowest score for X is the best result for O.

That’s the whole trick. A position’s score is the best score the player to move can guarantee, assuming the opponent also plays perfectly. Scores flow up the tree, alternating between max and min at each level.

Scoring finished games, with a depth twist

If every win scored the same, the search wouldn’t care whether it wins now or in five moves. It would also see no difference between losing next turn and losing much later. So the arm’s code in tic_tac_toe_rules.h adjusts each score by depth, the number of moves played in the search so far:

inline int minimax(Board &board, char player, int depth, int alpha, int beta) {
char winner = board.winner();
if (winner == 'X') return 10 - depth;
if (winner == 'O') return depth - 10;
if (board.full()) return 0;

An X win scores 10 minus the depth, so a faster win scores higher. An O win scores the depth minus 10, so a slower loss is less bad. A full board with no winner scores 0.

The candidate X move itself counts as depth 1. So an immediate win scores 10 − 1 = 9. If O wins straight after, that’s depth 2 and scores 2 − 10 = −8. A loss two moves further away scores −6, and so on. Keep those numbers in mind for the examples.

The algorithm in pseudocode

function minimax(board, player, depth):
if X has won: return 10 - depth
if O has won: return depth - 10
if board is full: return 0
if player is X:
best = -infinity
for each empty square:
play X there
best = max(best, minimax(board, O, depth + 1))
undo the move
else:
best = +infinity
for each empty square:
play O there
best = min(best, minimax(board, X, depth + 1))
undo the move
return best

To pick X’s move, you try each empty square, score it by calling minimax for O’s reply at depth 1, and keep the highest score. The real code also uses alpha-beta pruning, which I’ll come to shortly, but it returns the same answers.

Example 1: the immediate win

X has squares 1 and 2. O has 4 and 5. It’s X’s turn:

 X | X | 3
---+---+---
 O | O | 6
---+---+---
 7 | 8 | 9

Here’s what minimax gives each empty square:

X playsScoreWhy
39Completes the top row. X wins at depth 1.
60Blocks O’s middle row, but X misses its own win. Perfect play from there is a draw.
7−8O plays 6 and wins straight away at depth 2.
8−8Same: O plays 6 and wins.
9−8Same again.

Square 3 scores highest, so X takes the win. This is one of the cases the code’s own self-test checks: the score must be 9, and square 3 must be the only best move.

Look at square 6 too. Without minimax you might call it a “safe” move. Minimax shows it throws away a win.

Example 2: the forced block

O has squares 1 and 2. X has the centre. It’s X’s turn:

 O | O | 3
---+---+---
 4 | X | 6
---+---+---
 7 | 8 | 9
X playsScoreWhy
30Blocks the top row. Perfect play from there is a draw.
4, 6, 7, 8 or 9−8O plays 3 and wins at depth 2.

X has no winning threat of its own, so every move except 3 loses immediately. Minimax doesn’t need a special rule for blocking. It simply sees that every other line ends in a loss.

Example 3: the fork trap

This one surprised me the first time. O has taken opposite corners, 1 and 9. X has the centre. It’s X’s turn:

 O | 2 | 3
---+---+---
 4 | X | 6
---+---+---
 7 | 8 | O

The natural instinct is to grab another corner. Minimax says otherwise:

X playsScoreWhy
2, 4, 6 or 8 (an edge)0Creates an X threat O must answer. Perfect play draws.
3 or 7 (a corner)−6X threatens the diagonal, so O must block in the other corner. That block gives O two winning lines at once (a fork). X can only block one, and O wins at depth 4.

A −6 rather than −8 tells you the loss isn’t immediate. It’s two moves further away, but just as certain. The code’s self-test checks this position too, expecting the four edge squares and only those.

Openings, and why perfect play draws

On an empty board, all nine squares score 0. Whatever X does first, a perfect O can force a draw, and a perfect X can always avoid losing. That’s why the game is famously a draw between two good players.

The replies to an opening are less even. Here are the results for X’s reply when O opens:

O opens onX replies that draw (score 0)X replies that lose
5 (centre)1, 3, 7, 9 (corners)2, 4, 6, 8 (edges), each −4
1 (corner)5 (centre) onlyevery other square, each −4

A −4 means O can force a win at depth 6, three moves deep for each side. Those are exactly the traps that catch casual players. Minimax sees them because it looks all the way to the end of every line.

How big is the tree?

I counted the full tree from an empty board with the Python script:

  • 255,168 possible complete games, if play stops as soon as someone wins.
  • Of those, 131,184 are won by the player who moves first, 77,904 by the second player, and 46,080 are draws.
  • 549,946 positions visited in total, counting the empty board, if you walk every branch without shortcuts.
  • But only 5,478 distinct legal positions, because many move orders reach the same board.
  • For comparison, 9! = 362,880 is the number of ways to fill all nine squares in order. The real game count is lower because many games end early.

Half a million positions is nothing for a PC. On a microcontroller it’s worth trimming, which brings us to pruning.

Alpha-beta pruning, briefly

Alpha-beta pruning gives the same answer as plain minimax while skipping branches that can’t change the result. It tracks two numbers as it searches. Alpha is the best score X can already guarantee, and beta is the best score O can already guarantee. If a branch can’t beat what a player already has elsewhere, there’s no point exploring it. Here’s how the arm’s code does it:

    if (player == 'X') {
      if (score > best) best = score;
      if (best > alpha) alpha = best;
    } else {
      if (score < best) best = score;
      if (best < beta) beta = best;
    }
    // The opponent already has a better line elsewhere. Stop exploring.
    if (alpha >= beta) break;

When I ran the same pruned search in Python, scoring every opening move from the empty board, it visited about 34,000 positions instead of roughly 550,000. Each candidate move still gets its exact score, because the code starts each one with a fresh window of −100 to 100.

Returning every equally good square

This is where the arm’s code differs from most textbook versions. Instead of returning a single best move, bestMovesForX() returns every square that ties for the top score, packed into a bitmask:

    int score = minimax(board, 'O', 1, -100, 100);
    board.cells[square] = 0;
    if (score > result.score) {
      result.score = score;
      result.squares = 0;  // a strictly better score drops the previous ties
    }
    if (score == result.score) result.squares |= uint16_t(1) << square;

Some examples from above:

  • Empty board: all nine squares, mask 0x1FF.
  • Example 1: square 3 only.
  • Example 3: squares 2, 4, 6 and 8.
  • O opens in the centre: squares 1, 3, 7 and 9.

In robotMove() in main.cpp, that list goes to Gemini in the prompt with an instruction to choose only from it. Then the reply is checked: if Gemini names a square that isn’t in the set, the move is rejected and the arm doesn’t budge. When there’s only one right answer, Gemini has nothing to decide. When there are several, it gets some freedom, but it can never pick a losing move.

Wrapping up

Minimax is one of those ideas that looks almost too simple: score the endings, then take turns choosing the max or the min on the way back up. Tic-tac-toe is small enough to search completely, which makes it a great way to see the idea working end to end. The depth adjustment makes the arm win quickly and fight on when it’s behind, and alpha-beta pruning makes it practical on a small board.

If you want to experiment, the code is in the repo. Try changing the scoring, or set up the fork position on your own board and see if you can beat it.


Robot Arm Tic-Tac-Toe: Playing a Full Game with Minimax and Gemini

A maker at a workbench watching a desktop robot arm place a piece on a tic-tac-toe board

This is the next instalment in my robot arm tic-tac-toe series. In the first post I set out the goal: an arm that plays a real game against me, picking up and placing its own pieces. In step one I built a calibration routine so the arm knows where each square is. Now it’s time to put it all together. The arm plays a full game, with a bit of help from Google’s Gemini AI.

All the code is on GitHub in the tic-tac-toe-gemini-arm folder. Here’s what it does, how it’s put together and how to get it running on your own bench.

What it does

The rules are simple. I play O and place my pieces on the physical board by hand. The arm plays X. For each of its moves, it picks up an X piece from a spot beside the board and drops it on the square it has chosen.

The interesting part is how it decides. A minimax search on the board works out every move that’s equally good. Gemini then picks one of those moves, and any reply that isn’t on the list is rejected. More on why I did it that way shortly.

The hardware

From the README:

  • Arduino UNO R4 WiFi
  • Keyestudio Sensor Shield V5.2
  • Six arm servos on D0 to D5, with M0 (D0) as the gripper
  • A separate test servo on D11, used only from the calibration page. It isn’t part of the arm or the stored poses
  • An external servo supply of about 6 V into the shield, with its ground tied to the UNO ground

That last point matters. I learned early on that the board can’t power a bank of servos, and the code is explicit about it: the UNO’s 5 V pin is for logic only. Because the serial monitor runs over USB, D0 and D1 are free to use as servo signals.

How the project is structured

It’s a PlatformIO project rather than a single Arduino sketch, which makes the pieces easier to keep apart:

The brains: minimax first

Tic-tac-toe is small enough to solve completely, so there’s no need for an AI to work out the best move. The rules header does that with an alpha-beta minimax search, scored from X’s point of view. A faster win scores higher, and a slower loss is less bad:

char winner = board.winner();
if (winner == 'X') return 10 - depth;
if (winner == 'O') return depth - 10;
if (board.full()) return 0;

Rather than returning one best square, bestMovesForX() returns every square that ties for the best score, stored as a bitmask. On an empty board, for example, all nine squares come back as equally good, because perfect play from both sides is a draw.

There’s also a selfTest() that runs at startup. It checks illegal moves, every winning line, a draw, a one-move win, a forced block, the classic corner fork and the reply to a centre opening. If any check fails, the arm refuses to move. You can rerun it at any time with the TEST serial command.

Where Gemini fits in

So if minimax already knows the answer, why use Gemini? Because there’s often more than one right answer, and I wanted to experiment with letting an AI model make that choice while keeping it on a very short leash.

In robotMove(), the code builds a prompt listing the equally optimal squares and the current board, and asks for a JSON reply:

String prompt = "Play tic tac toe as X against human O. Either player may start. ";
prompt += "A complete minimax search has identified these equally best moves: [" + optimalSquares + "]. ";
prompt += "Choose ONLY from this set. For an empty board prefer a corner from the set, to create fork opportunities. ";
prompt += "Return only JSON {\"square\":N} with one integer from the optimal set. Board: ";

The reply then has to pass three checks before anything moves. It must parse as JSON with an integer square, the square must be in the minimax set, and it must be a legal move on the board:

int square = choice["square"].as<int>();
if (!best.contains(square)) {
say("[Minimax] Rejected Gemini move: not in the optimal set. No motion. Send RETRY.");
return;
}

If any check fails, or the request itself fails, the board is left unchanged and I can send RETRY. Gemini can choose, but it can’t make a bad move. To me that’s a nice small example of a bigger idea: let the AI make the call, but have plain code check its work.

The connection helper keeps things tidy too. It sends the API key in the x-goog-api-key header rather than in the URL, insists on HTTPS, asks for a JSON response type and caps the output at 256 tokens. It also skips any “thought” parts that thinking models return, so only the visible answer is used. And it won’t call Gemini at all while the key is still the placeholder.

Because the Gemini call blocks (the code allows up to 20 seconds for the response), it isn’t made from inside a web request. The move is queued, and the main loop runs it only once the arm is idle, so the browser gets an immediate reply.

How it drives the arm

This is a big step up from the one-degree-at-a-time stepping in the calibration post. Motion is now a short plan of eased segments on a shared clock, and a 200 Hz hardware timer writes the servo pulses. That means Wi-Fi work in the main loop doesn’t stall a move that’s already under way.

Each X move follows the same sequence:

  1. Open the gripper at home.
  2. Travel to the off-board pickup point.
  3. Close the gripper on the piece and let it settle.
  4. Lift off the pile and return home, still holding the piece.
  5. Carry it to the chosen square and pause.
  6. Open the gripper to drop the piece.
  7. Lift clear of the piece and return home.

M3 is treated as the lift joint. During a transfer it rises towards a clearance angle first, and the other joints start moving once it’s 60% of the way up. On the way back from placing a piece, the lift finishes completely before anything else swings, so the gripper doesn’t clip the piece it just put down. And if X wins, the arm does a small victory jig at home.

The servos stay detached until you arm them. The first arming move jumps straight to the home pose, so support the arm and clear its travel first. After that, everything is eased.

Calibration, now with memory

In step one the saved poses lived in RAM and disappeared on a restart. That’s fixed here. The calibration page at /calibrate lets you choose a target (squares 1 to 9, the off-board pickup or home), jog M0 to M5, save the angles and then press Store to flash. All 11 poses are written to EEPROM with a checksum, so they survive a reset. Until you calibrate, compiled default poses are used.

The same page sets how far the gripper closes and which direction opens it (stored separately), lets you preview a saved pose and can jog or sweep the D11 test servo.

Playing a game

Once Wi-Fi connects, the serial log prints the device address. Browse to http://<device-ip>/ for the game page. Arm the servos, choose who starts, place your O on the physical board, then tap the same square on the page. An output panel shows the same log as the serial monitor, so you can watch the minimax result and Gemini’s reply as they happen.

Everything also works from the serial monitor at 115200 baud. Send ? for the full list. The useful ones are ARM, FIRST or SECOND to choose who starts, 1 to 9 to play your O, RETRY, NEW, BOARD and STATUS. STOP or ! cancels motion and the game but keeps the servos holding, while RELEASE detaches every servo, so support the arm first.

Setting it up

  1. Copy the two example headers: cp include/wifi_secrets.example.h include/wifi_secrets.h and cp include/gemini_config.example.h include/gemini_config.h.
  2. Put your 2.4 GHz Wi-Fi name and password in wifi_secrets.h.
  3. Put your Gemini API key and model URL in gemini_config.h. The URL is the full https address, including the generateContent path.
  4. Build, upload and open the monitor with pio run -e uno_r4_wifi, pio run -e uno_r4_wifi -t upload and pio device monitor -b 115200.
  5. Calibrate every target on /calibrate and store to flash.
  6. Put an X piece on the pickup point before each robot move, then play.

The example config shows the shape of the URL:

inline constexpr const char *GEMINI_URL =
"https://generativelanguage.googleapis.com/v1beta/models/YOUR_MODEL:generateContent";

What I take away from it

The game logic was never the hard part. The real work was in the bits around it: safe arming, smooth motion that doesn’t knock pieces over, poses that survive a restart, and treating the AI’s answer as a suggestion to be checked rather than an order to be followed.

From the original plan, the arm can now play a full game with me entering my moves. The next big step is closing the loop, so it can see my move on the board without me tapping a square. As always, I’ll share how it goes. If you build one, let me know how yours plays.

Robot Arm Tic-Tac-Toe, Step One: Teaching the Arm Where the Board Is

A maker at a workbench guiding a desktop robot arm over a three-by-three game board

In my last post I laid out the plan to teach my robot arm to play tic-tac-toe. The very first item on that plan was fixed positions: record the servo angles for each of the nine squares and the pick-up point. Before the arm can play anything, it has to know where everything is. So that’s where I’ve started, with a calibration routine.

Why calibration comes first

It’s tempting to jump straight to the fun stuff, the game logic or the camera. But none of that matters if the arm drops a piece halfway between two squares. Hobby servos aren’t precise, and the arm doesn’t know anything about the board in front of it. All it understands is six angles between 0 and 180 degrees.

Rather than trying to calculate those angles (that’s the kinematics rabbit hole I’m avoiding for now), the simpler approach is to teach by hand. Move the arm to a square, check it looks right, and record the angles. Do that nine times and you have a map of the board. It’s not clever, but it’s repeatable, and repeatable is what I need right now.

The firmware: positioning.ino

The code that runs on the board is positioning.ino. It turns the arm into a small web server on my Wi-Fi network, so I can drive it from a browser rather than editing and re-uploading code every time I want to nudge a joint. It uses the WiFiS3 library for the network side and the standard Servo library for the motors.

Everything is built around six motors and nine stored poses, one for each cell of the 3×3 board:

constexpr uint8_t motorCount = 6;
constexpr uint8_t boxCount = 9;
const uint8_t motorPins[motorCount] = {0, 1, 2, 3, 4, 5};
const int minimumAngles[motorCount] = {0, 0, 0, 0, 0, 0};
const int maximumAngles[motorCount] = {180, 180, 180, 180, 180, 180};
const int homeAngles[motorCount] = {180, 90, 90, 135, 180, 90};

A couple of design choices are worth pointing out.

First, the servos aren’t attached when the board powers up. The controller connects to Wi-Fi and waits. Nothing moves until I explicitly press Arm, which calls the arm endpoint. That stops the arm lurching into life the moment I plug it in.

Second, motion is gradual. Instead of slamming a servo straight to its target, each joint steps one degree at a time with a short pause between steps:

void moveMotorTo(uint8_t motorIndex, int targetAngle) {
targetAngle = constrain(targetAngle, minimumAngles[motorIndex], maximumAngles[motorIndex]);
while (currentAngles[motorIndex] != targetAngle) {
currentAngles[motorIndex] += currentAngles[motorIndex] < targetAngle ? 1 : -1;
motors[motorIndex].write(currentAngles[motorIndex]);
delay(15);
}
}

The target is also clamped to each motor’s allowed range, so a bad value can’t drive a joint past its limits.

A tiny API for teaching poses

The browser talks to the arm through a handful of simple GET endpoints:

  • / serves the control page.
  • /api/state returns the current angles, which poses are saved and the saved values, as JSON.
  • /api/arm attaches the servos.
  • /api/select?box=N picks which of the nine cells I’m about to record.
  • /api/jog?motor=M&angle=A moves one joint to an angle.
  • /api/save stores all six current angles into the selected cell.

Jogging and saving are refused until the servos are armed, and the motor number, angle and box number are all validated before they’re used. Saving is about as simple as it gets:

for (uint8_t motor = 0; motor < motorCount; motor++) {
boxAngles[selectedBox][motor] = currentAngles[motor];
}
boxSaved[selectedBox] = true;

So the routine is: arm, select a cell, jog each joint until the gripper sits where I want it, save, then move on to the next cell. One thing to be aware of is that the saved poses live in memory, so they’re gone if the board restarts. For now I’ll copy them out once I’m happy with them.

The web app: arm-controller-demo.html

The second file, arm-controller-demo.html, is a browser-only demo of the controller interface. It doesn’t connect to any hardware. It simulates the arm, so you can open it on any machine and get a feel for how the calibration workflow runs before you wire anything up. Saved poses disappear when you reload the page.

It includes:

  • A side-view diagram of the arm that updates as the angles change, with the six joints labelled base rotation, shoulder, elbow, wrist pitch, wrist roll and gripper.
  • A slider plus fine-adjust buttons for each motor, and a test button that sweeps a motor to 0°, then 180°, then back to where it started.
  • A 3×3 grid to choose which cell to map, plus an extra pickup target outside the board.
  • A saved poses table and a button to copy the results out as a C++ table.

That last feature is the bit I like most. Once the poses are recorded, the export is ready to paste back into code:

// Preview data only. -1 indicates an unsaved pose; do not command it.
const int cellAngles[9][6] = { ... };
// Outside-board pickup; keep the resting/home pose separate.
const int pickupAngles[6] = { ... };

The demo is a step ahead of the firmware in one respect: it has the pickup position, while the firmware currently stores just the nine board cells. Adding the pickup slot to the board code is on my list.

What I’ve learned so far

  • Teach, don’t calculate (yet). Recording positions by hand gets me a working board map far faster than maths would.
  • Safety first. Not attaching servos until asked, and moving one degree at a time, saves a lot of flinching at the bench.
  • A browser beats re-uploading. Jogging from a web page means I can nudge a joint and see the result straight away, without a compile and upload cycle for every tweak.

Next steps

With a way to record where every square is, the next job is reliable pick and place: grab a piece from the pickup spot and drop it cleanly into any cell. I’ll also look at keeping the saved poses when the board restarts. Both files are on GitHub if you want to take a look or adapt them for your own arm. As always, I’ll share how it goes, wobbles and all.

Next Project: Teaching My Robot Arm to Play Tic-Tac-Toe

Human hand and a desktop robot arm placing pieces on a tic-tac-toe board

It’s time to dust off the robot arm. If you’ve been following along, you’ll know I built the 6DOF Programmable Robot Arm Kit from IDY Production, then spent a fair while getting it to actually work. My next project is to have that arm play tic-tac-toe against me, physically picking up and placing its own pieces on a real board.

The goal

Simple to say, harder to do. I want to sit down at the bench, make my move, and have the arm work out its reply and place its piece in the right square. No screen, no app. Just me, a board and an arm that (hopefully) doesn’t knock everything onto the floor.

Where I’m starting from

The arm has six servos, aluminium plates and a gripper, driven by a Keyestudio UNO R3 board. I learned early that the board can’t power a bank of servos, so they run from my bench top power supply, and I tidied the wiring with a Keyestudio sensor shield. Last time I got it doing a repeating pick-and-place routine, one servo at a time, and then moved on to multi-motor movement, which sent me down the rabbit hole of kinematics. Tic-tac-toe is a good excuse to finally climb back out of that hole with something working.

Why it’s an interesting challenge

Tic-tac-toe is a trivial game for a computer. Everything around it isn’t. Here’s what I think makes it worth doing:

  • Knowing the board. The arm needs to know where I’ve played. That could start as me typing my move in, but the real goal is for it to sense the board itself.
  • Game logic. The game is small enough to solve completely, so the arm should never lose. Whether I write a classic algorithm or experiment with an AI model to choose moves is part of the fun.
  • Pick-and-place accuracy. Nine squares, each only a few centimetres wide. The piece has to land in the middle of the right one, not halfway into the next.
  • Calibration. Hobby servos aren’t precise, and small errors at the shoulder become big errors at the gripper. I’ll need a repeatable way to map squares to arm positions.
  • Vision. Possibly a camera to read the board. I finally had success with the Arducam, so that’s an obvious candidate, though I’m not committing yet.

The rough plan

  1. Fixed positions first. Build a board and a piece supply in fixed spots, then record the servo angles for each of the nine squares and the pick-up point.
  2. Reliable pick and place. Get the arm to move any piece to any square, smoothly and repeatably, using the multi-motor movement I already have.
  3. Add the brain. Write the game logic so the arm can play a full game with me entering my moves manually.
  4. Close the loop. Add sensing, ideally a camera, so the arm can see my move without any help.
  5. Revisit kinematics. If time allows, swap recorded positions for inverse kinematics so the board can move without recalibrating everything.

No doubt each step will take longer than I think. That’s been the pattern with every project here so far.

What I’ll share

As always, I’ll post the wins and the failures as I go: wiring changes, calibration tricks, videos of the arm in action and my code on GitHub alongside the earlier routines. If you’ve built something similar, or have tips on cheap board sensing, let me know. Stay tuned.

Robot Arm with Multi Motor Movement

I’ve improved the movement of my robot arm by implementing multi motor movement. This means moving large distances will be more efficient since the arm can take a more direct route. You can see this in the video I created above. You’ll find my code for this routine here:

https://github.com/directorcia/Azure/blob/master/Iot/Arduino%20Uno%20R3/Robot%20Arm/routine2.cpp

This has lead me to go down the rabbit hole of kinematics.

Kinematics is the science of motion without considering forces. For robot arms, it answers questions like:

  • Where should each joint move to place the end-effector at a specific position?

  • What angle should each servo rotate to reach a target point?

There are two primary types:

  • Forward Kinematics – You provide joint angles, and it calculates the end-effector’s position.

  • Inverse Kinematics (IK) – You provide a desired end-effector position, and it calculates the joint angles needed to get there.

I’m going to try and implement kinematics for my arm going forward, so stay tuned for updates.