Bluetooth Beacon fail

image

After getting my robot car to navigate autonomously around the next challenge was to have it hone in on a beacon. The initial suggestion was to use another Acebott ESP32 broadcasting a repeated Bluetooth signal.

In short, this ended up failing simply because the Bluetooth signal was simply not strong enough across any meaningful distance (that is, greater than 2 metres).

It want to make this project work and the suggested next options is to use something called ESP-NOW.

ESP-NOW: Direct Device-to-Device Communication for ESP32 Projects

What is ESP-NOW?

ESP-NOW is a proprietary wireless communication protocol developed by Espressif that allows ESP32 and ESP8266 devices to communicate directly with each other without requiring a Wi-Fi router, access point, or internet connection.

Think of it as a lightweight, low-latency messaging system that uses the ESP32’s Wi-Fi radio to exchange data directly between devices.


Key Benefits
  • No Wi-Fi network required
  • Low latency communication
  • Low power consumption
  • Simple device-to-device messaging
  • Works alongside Wi-Fi in many scenarios
  • Native support on ESP32 hardware
  • Typical range often exceeds BLE


How It Works

Rather than sending data through a router:

ESP32 —> Router —> ESP32

ESP-NOW allows direct communication:

ESP32 <—–> ESP32

Each device is identified by its MAC address, allowing messages to be exchanged directly.


Typical Uses

ESP-NOW is popular for:

  • Robot-to-robot communication

  • Sensor networks

  • Remote controls

  • Home automation

  • Wireless telemetry

  • Drone communications

  • IoT projects requiring low latency


For ESP32-to-ESP32 projects, ESP-NOW is often preferred over BLE when communication range and update frequency are important.


Using ESP-NOW for Robot Navigation

A robot can receive regular beacon packets from a stationary ESP32 and use that information to estimate whether it is moving closer to or further away from the destination.

Example:

-85 dBm = Far

-70 dBm = Closer

-55 dBm = Very Close


Limitations

ESP-NOW provides:

✅ Fast communication

✅ Good range

✅ Direct device-to-device connectivity

ESP-NOW does not provide:

❌ Precise distance measurements

❌ Direction information

❌ Indoor positioning

For navigation applications, RSSI values can be affected by:

  • Walls

  • Furniture

  • Metal objects

  • Reflections

  • People moving through the environment


Why ESP-NOW Matters

For ESP32-based projects, ESP-NOW offers a simple and effective way to exchange data between devices without the complexity of Wi-Fi networking. It is particularly useful when low latency, low power consumption, and direct communication are more important than internet connectivity.

For robotics, ESP-NOW can provide a low-cost method for building wireless beacons, sharing telemetry, and coordinating multiple robots using hardware many makers already have available.

Apparently, I can use ESP-NOW and still have the Robot car connected to the Internet via Wifi. Given that it won;t cost me anything except some time to code, let’s see how we go.
Having the device show my fortune

After getting the ESP32 talking to the local LLM the next stage was to do something more than just flashing an LED. I decided that I’d use the LLM to produce a ‘fortune’ for me and then display that on an OLED screen I’d connect to the ESP32.

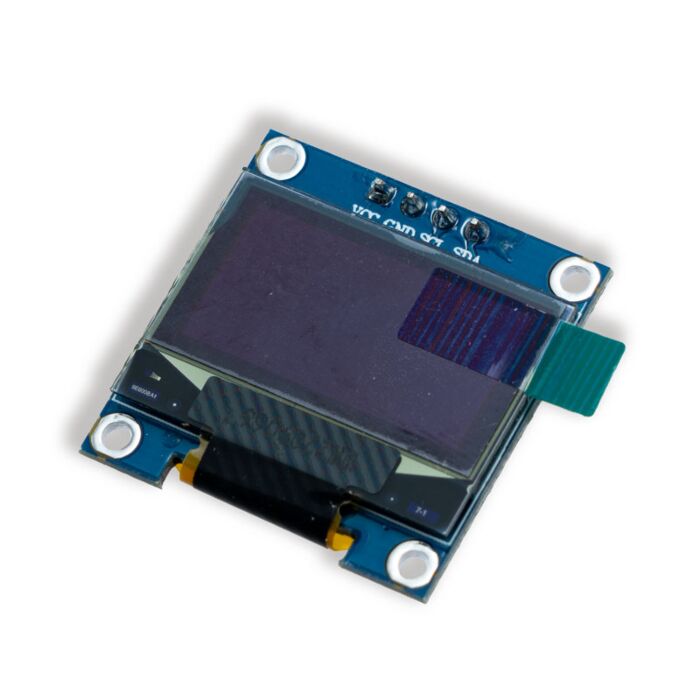
The OLED screen in question was this White I2C OLED display (SSD1306).

White I2C OLED display (SSD1306)

To use this OLED you need the Adafruit_SSD1306 library.

Here is the prompt being sent to the local LLM:

You are a mystical fortune teller. Give one short fortune. Maximum 12 words.  No introduction. No quotes.

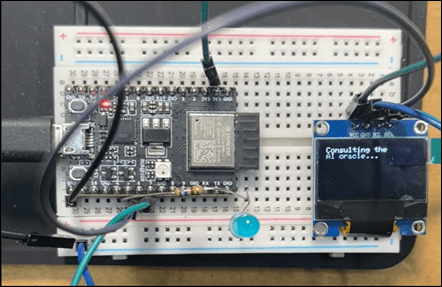
The result from the LLM is then displayed on the OLED screen which is connected to the ESP32-C3-DevKitM-1 via GPIO6 and GPIO7 acting as SDA and SCL communication ports. I also left the external LED on GPIO4, from the last project, as well to aid troubleshooting.

The code is here:

https://github.com/directorcia/Azure/blob/master/Iot/LLM/llm-fortune.ino

and the results look like:

Screenshot 2026-07-10 084030

Video URL = ESP32 displaying results from local LLM

Connecting a joystick controller to an ACEBOTT ESP32 Smart Car

blog

After being able to control the Acebott ESP32 Smart car via a web server my next aim was to control it using am Xbox/Playstation style joystick controller.

Initially I thought hat I could use an older Xbox style controller. Turns out these use 2.4Ghz wireless and a proprietary connection. Then I thought I could use a newer style Xbox controller that is Bluetooth, but it turns out they use Bluetooth 5 and use proprietary encryption. I did see a few of these working on the Internet but for the life of me I couldn’t get it to work.

I therefore asked AI which controller would be the easiest to get working and was told to get:

8BitDo Ultimate 2C Bluetooth Controller for Switch/Switch 2, Wireless Controller with 6-Axis Motion Control, Rumble Vibration, Refined D-Pad and Bumpers, and Hall Effect Joysticks (Blue)

This launched me into a world a hurt and failure (thanks AI). In short, this 8BitDo controller appears to also only be Bluetooth 5 and the Acebott ESP32 only supported Bluetooth 4.2 LE (Low Energy).

Making the same mistake twice (what’s the definition of stupidity again?) I asked AI to recommend a different ESP32 board that would work with the 8BitDo and was told that a “ESP32-C3 DevKit” would be the most reliable. I then went and bought an ESP32-C3 Mini Development Board. Even after being ‘100% sure’ that it would work, the AI could not make it work either.

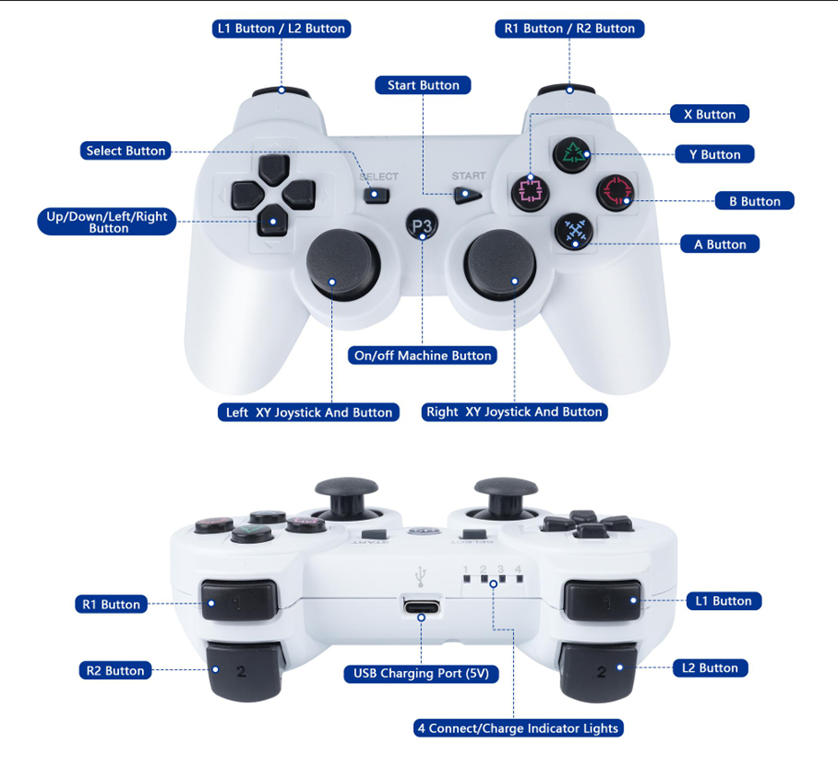
I then came across the ACEBOTT Bluetooth Controller Expansion for QD001, which is designed for the Acebott Smart Car.

image

With this I finally could get the controller talking to the ESP32 on the Smart Car. However, to pair the controller and the ESP32 I needed to specific the MAC address of the controller, which is conveniently on the bottom of the controller. But to get the ESP32 to pair back to the controller I needed to embed the MAC address of the ESP32 Bluetooth connection into the controller. To do this it recommended using a Sixasix Pair tool. For the life of me, I couldn’t get this to work but with my Controller at least paired to the ESP32 I could send commands which is all I really wanted.

I got AI to rewrite the code to allow the PS3 style controller to control the movement of the SmartCar. I have uploaded the code here:

https://github.com/directorcia/Azure/blob/master/Iot/Acebott/Smartcar/QD010/car-ps3.cpp

I also needed to add some speed trimming of the motors because the car was veering off in one direction. The documentation for the above code is here:

https://github.com/directorcia/Azure/blob/master/Iot/Acebott/Smartcar/QD010/car-ps3-overview.md

This whole process proved much harder that I expected and getting a Bluetooth working initially as extremely frustrating given teh different versions and controllers, but now the ‘generic’ PS3 style controller works well!

ACEBOTT ESP32 Smart Car with web control

image

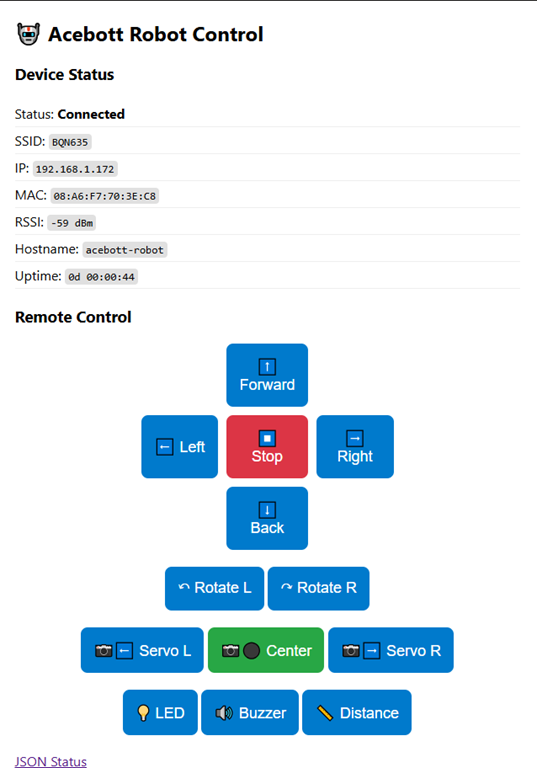
Now that I had my robot car working with IR I upgraded the code to also allow control via a web server hosted on the ESP32.

You’ll find the code for the controller here:

https://github.com/directorcia/Azure/blob/master/Iot/Acebott/Smartcar/with-web-serve.cpp

and documentation here:

https://github.com/directorcia/Azure/blob/master/Iot/Acebott/Smartcar/with-web-serve.md

More controller updates coming.