

My initial prototype started back here:
and is now at the point where I am designing version 2.
The biggest change for version 2 will be the replacement of the 5 individual LEDs and the board they live on with a Keyestudio 40 RGB LED WS2812 Pixel Matrix Shield for Arduino:

The main reasons for this are:
– less soldering is required
– the LEDs are brighter
– there will be a 5 x 8 matrix of LEDS allowing more options
– the shield plugs directly into the controller board
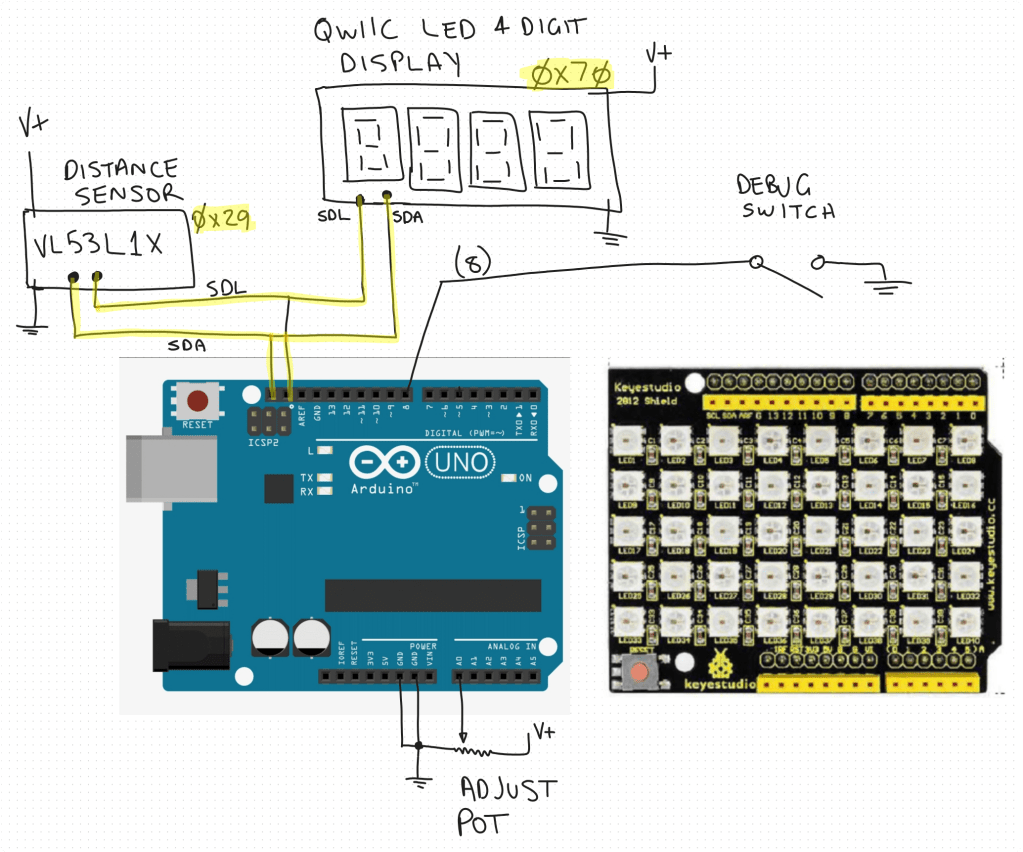
So the circuit diagram will now look like:
The code will, at least initially remain functionally the same but may get enhanced once I have it working.
I have ordered an additional distance sensor and QWIIC LED 4 Digit display but the LED shield is ready to go as you can see in this video:
Video link = https://www.youtube.com/watch?v=49V33TKXt3c
The test code shown in video is here:
I think this LED shield will be a big improvement for the project, so stay tuned for more updates soon.
